
November 05, 2026
Name badges may seem like a small detail, but they play an important role in keeping your event running smoothly.
Think about what happens on event day. Attendees arrive, badges need to be printed quickly, and last-minute changes are inevitable. Once attendees start networking, their badges often flip over, hiding their names and other important information. Meanwhile, staff may struggle to distinguish between different sponsor and exhibitor tiers when checking access to special areas or providing tier-specific benefits.
How can you make badges look professional, keep important information visible, and help your staff quickly recognize who’s who—all without complicating check-in and badge printing?
Whova has been continuously improving its name badge tools to make the entire process easier. Organizers can customize badge designs, choose from a large gallery of ready-to-use templates, and make last-minute edits without starting over.
For printing, Whova supports a wide range of printers, including label printers and standard office printers. You can print badges in advance or on demand, and even turn iPads into self-service check-in kiosks where attendees can correct typos or update their preferred names before printing.
Now, we’re introducing two more enhancements to make name badges even more professional and useful throughout your event.
1. Print professional, double-sided fanfold badges directly at check-in.
Name badges often flip over as attendees walk around and network, hiding their names and other important information. Whova already supports double-sided badges using duplicated, double-size badge designs. Now, we’re offering another option: Fanfold Badge Printing with compatible label printers.
Whether you’re using Whova’s Check-in Kiosk or on-demand printing, you can easily print fanfold badges on site, with information visible on both sides. Whova automatically handles the printing alignment, helping you create professional-looking badges without extra effort.
2. Display sponsor and exhibitor tiers directly on badges for easy identification.
When sponsors and exhibitors have different packages and benefits, your staff needs a quick way to recognize their tiers for some exclusive access. Instead of checking separate lists or manually verifying their status, you can now display Sponsor and Exhibitor Tier Labels directly on name badges.
Staff can identify Platinum, Gold, Silver, or other custom tiers at a glance, making it easier to provide the right benefits and manage access to VIP lounges, exclusive networking sessions, and other special areas.
With these updates, you can:
- Print fanfold badges on site during check-in: Print fanfold badges directly through on-demand badge printing or through the self check-in Kiosk. Set up your badge design and let Whova handle the fanfold printing alignment.
- Create a polished on-site badge experience: Keep important badge information visible from either side, so attendees and staff can easily see key details even when badges flip over.
- Make tier info visible at a glance: Make it easier for staff to identify tier-based access and benefits (like VIP lounge entry or exclusive networking sessions) by displaying exhibitor or sponsor tier information directly on badges, eliminating the need to manually confirm tiers during the event.
With these enhancements, Whova helps you create badges that look professional, communicate important information at a glance, and make check-in and on-site coordination easier.
Ready to make your event badges work harder for you? Read on to see how these new tools can improve your badge design and printing experience.
Create and Print Fanfold Badges Before Your Event
You can easily generate fanfold badges in advance to prepare for event day.
Once you have created and designed your name badge template on the Name Badges page, open Edit settings and select your printer type.
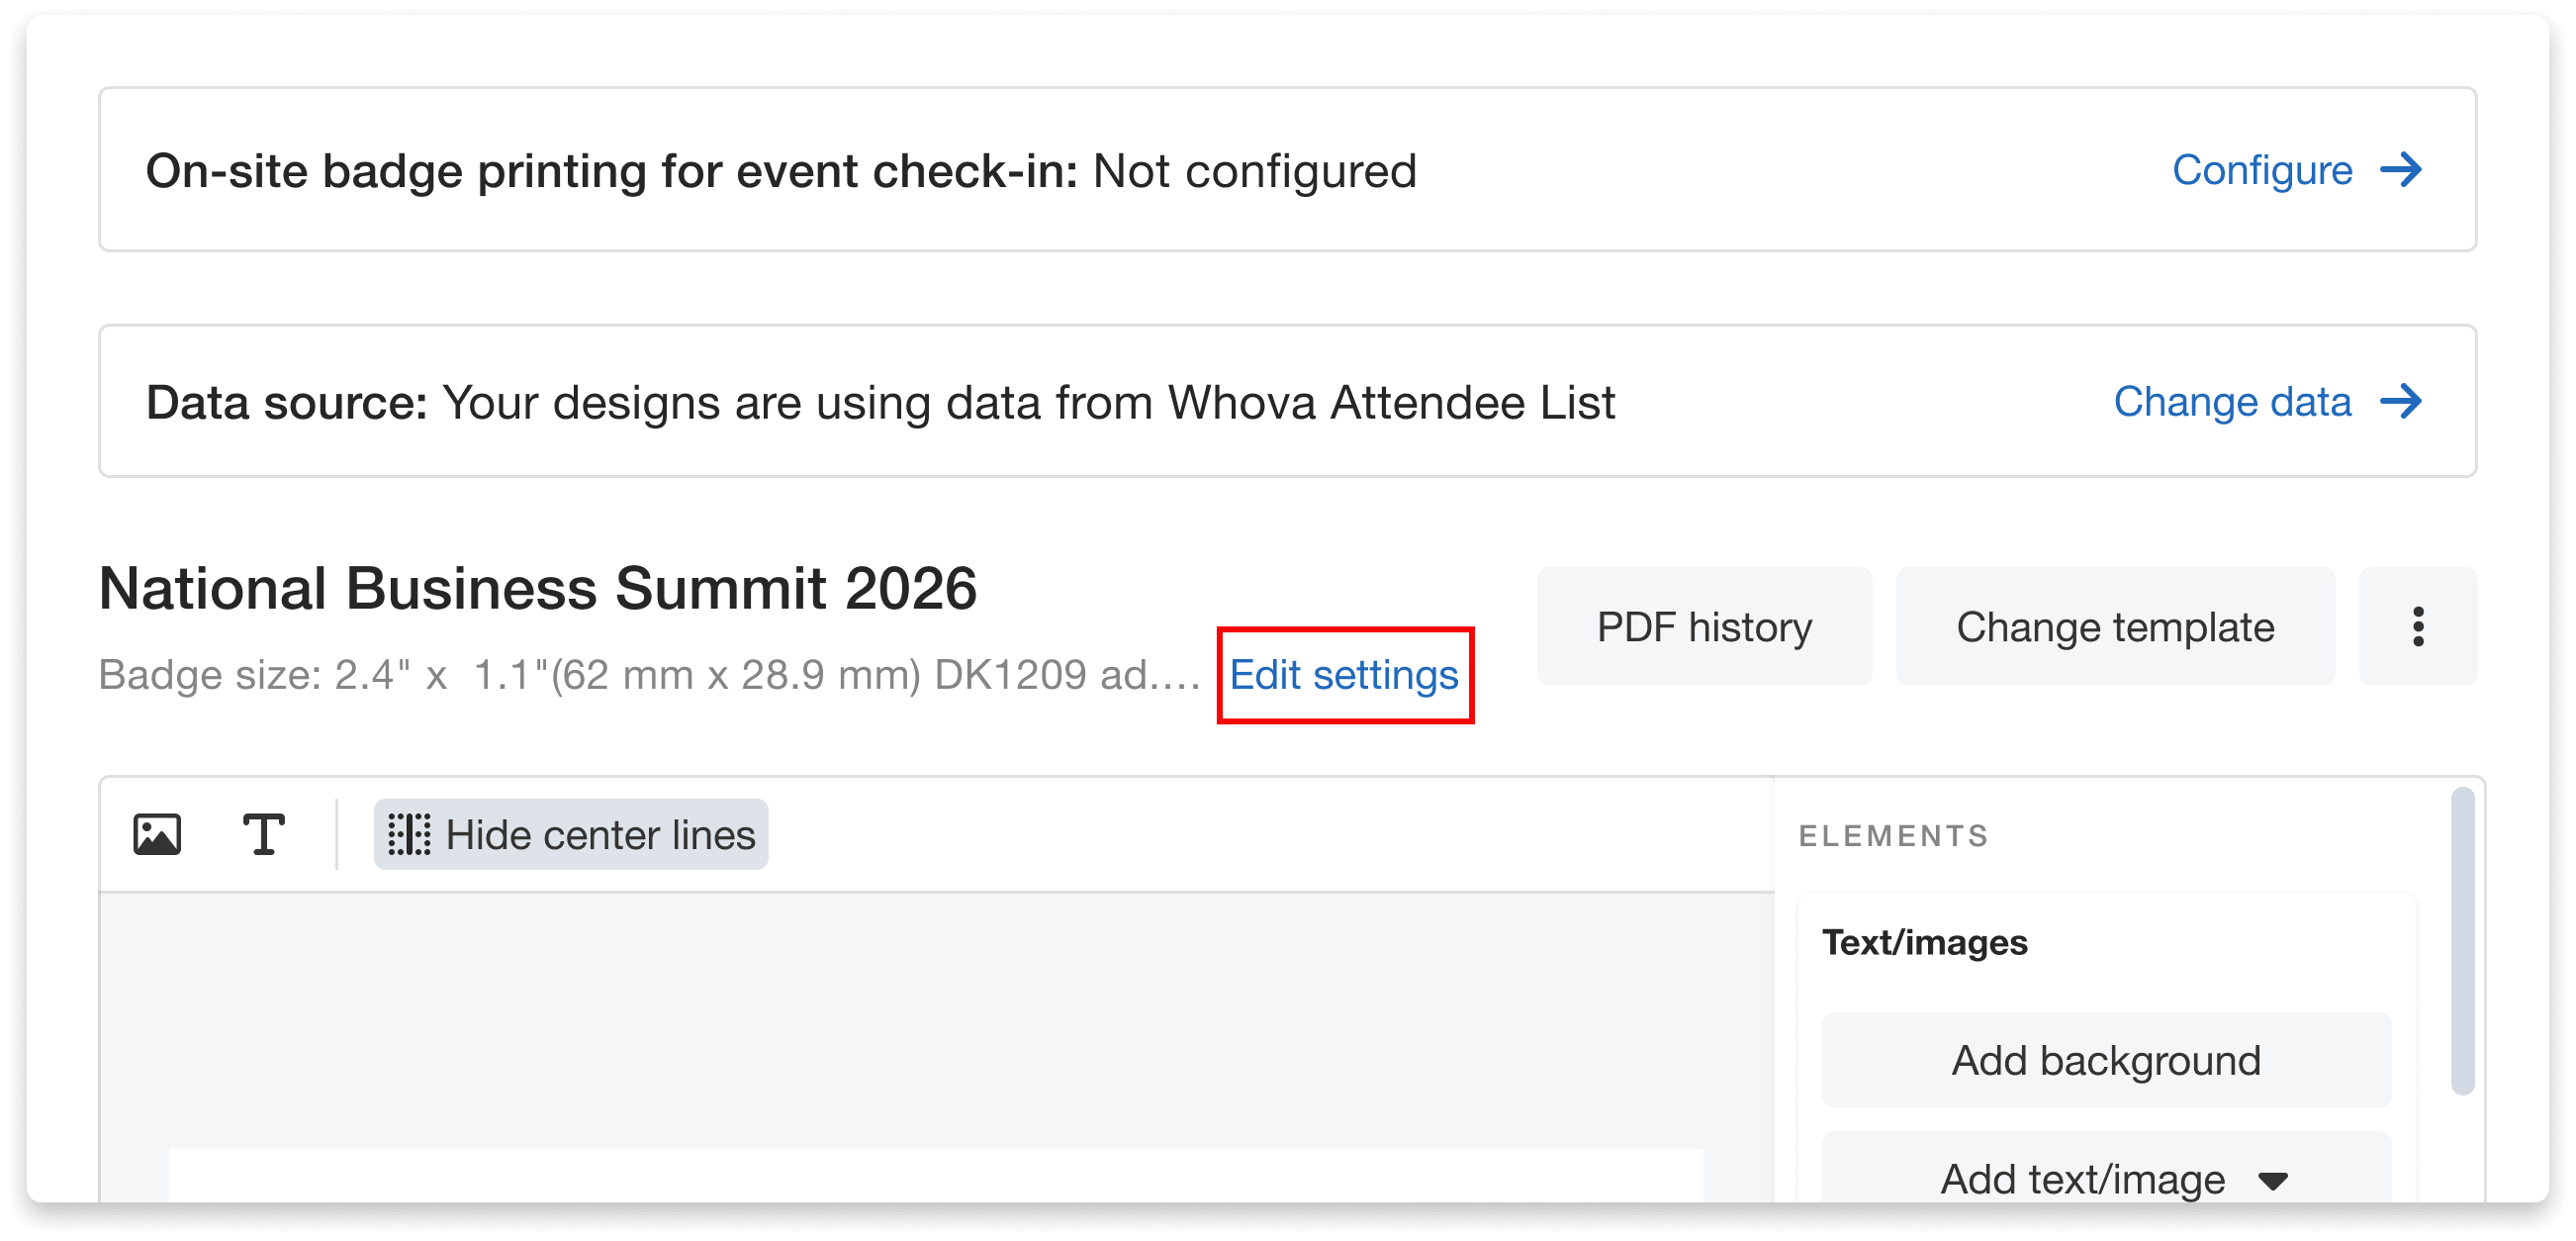
After designing your badge template, select a compatible printer if you haven’t already.
Whova’s fanfold printing is compatible with Brother, Zebra, DYMO, and other specified label printers. Standard office printers don’t support fanfold printing, although they can still be used for single-sided and double-sided badges. Click Compatible printers and paper to review our supported printer types.
After selecting your printer type and finalizing the badge design, click Generate badges. Specify which attendees you’d like to generate badges for. These options include:
- All Attendees
- Specific attendee categories (e.g., organizers, speakers, sponsors, exhibitors)
- Specific attendee ticket types
- Manually selected attendees
Optionally, choose to create badges for only in-person attendees and/or badges that haven’t already been generated.
Review your selected attendee list, then continue to the Configure print options page. Here, in the Print format section, you’ll see three printing options:
- Single-sided printing: Print one copy of the badge design on one side of blank name badge paper.
- Duplicate printing: Print two copies of the badge design, either on standard badge paper or as adhesive labels that can be attached to both sides of a plastic badge.
- Fanfold printing: Print two connected copies of the badge design on fanfold badge stock, with one copy upside down so both sides are right-side up when the badge is folded.
Select Fanfold printing before continuing. Then, pick the setting that matches the black marks on your chosen fanfold badge stock:
- One black mark per folding line
- One black mark on every other folding line
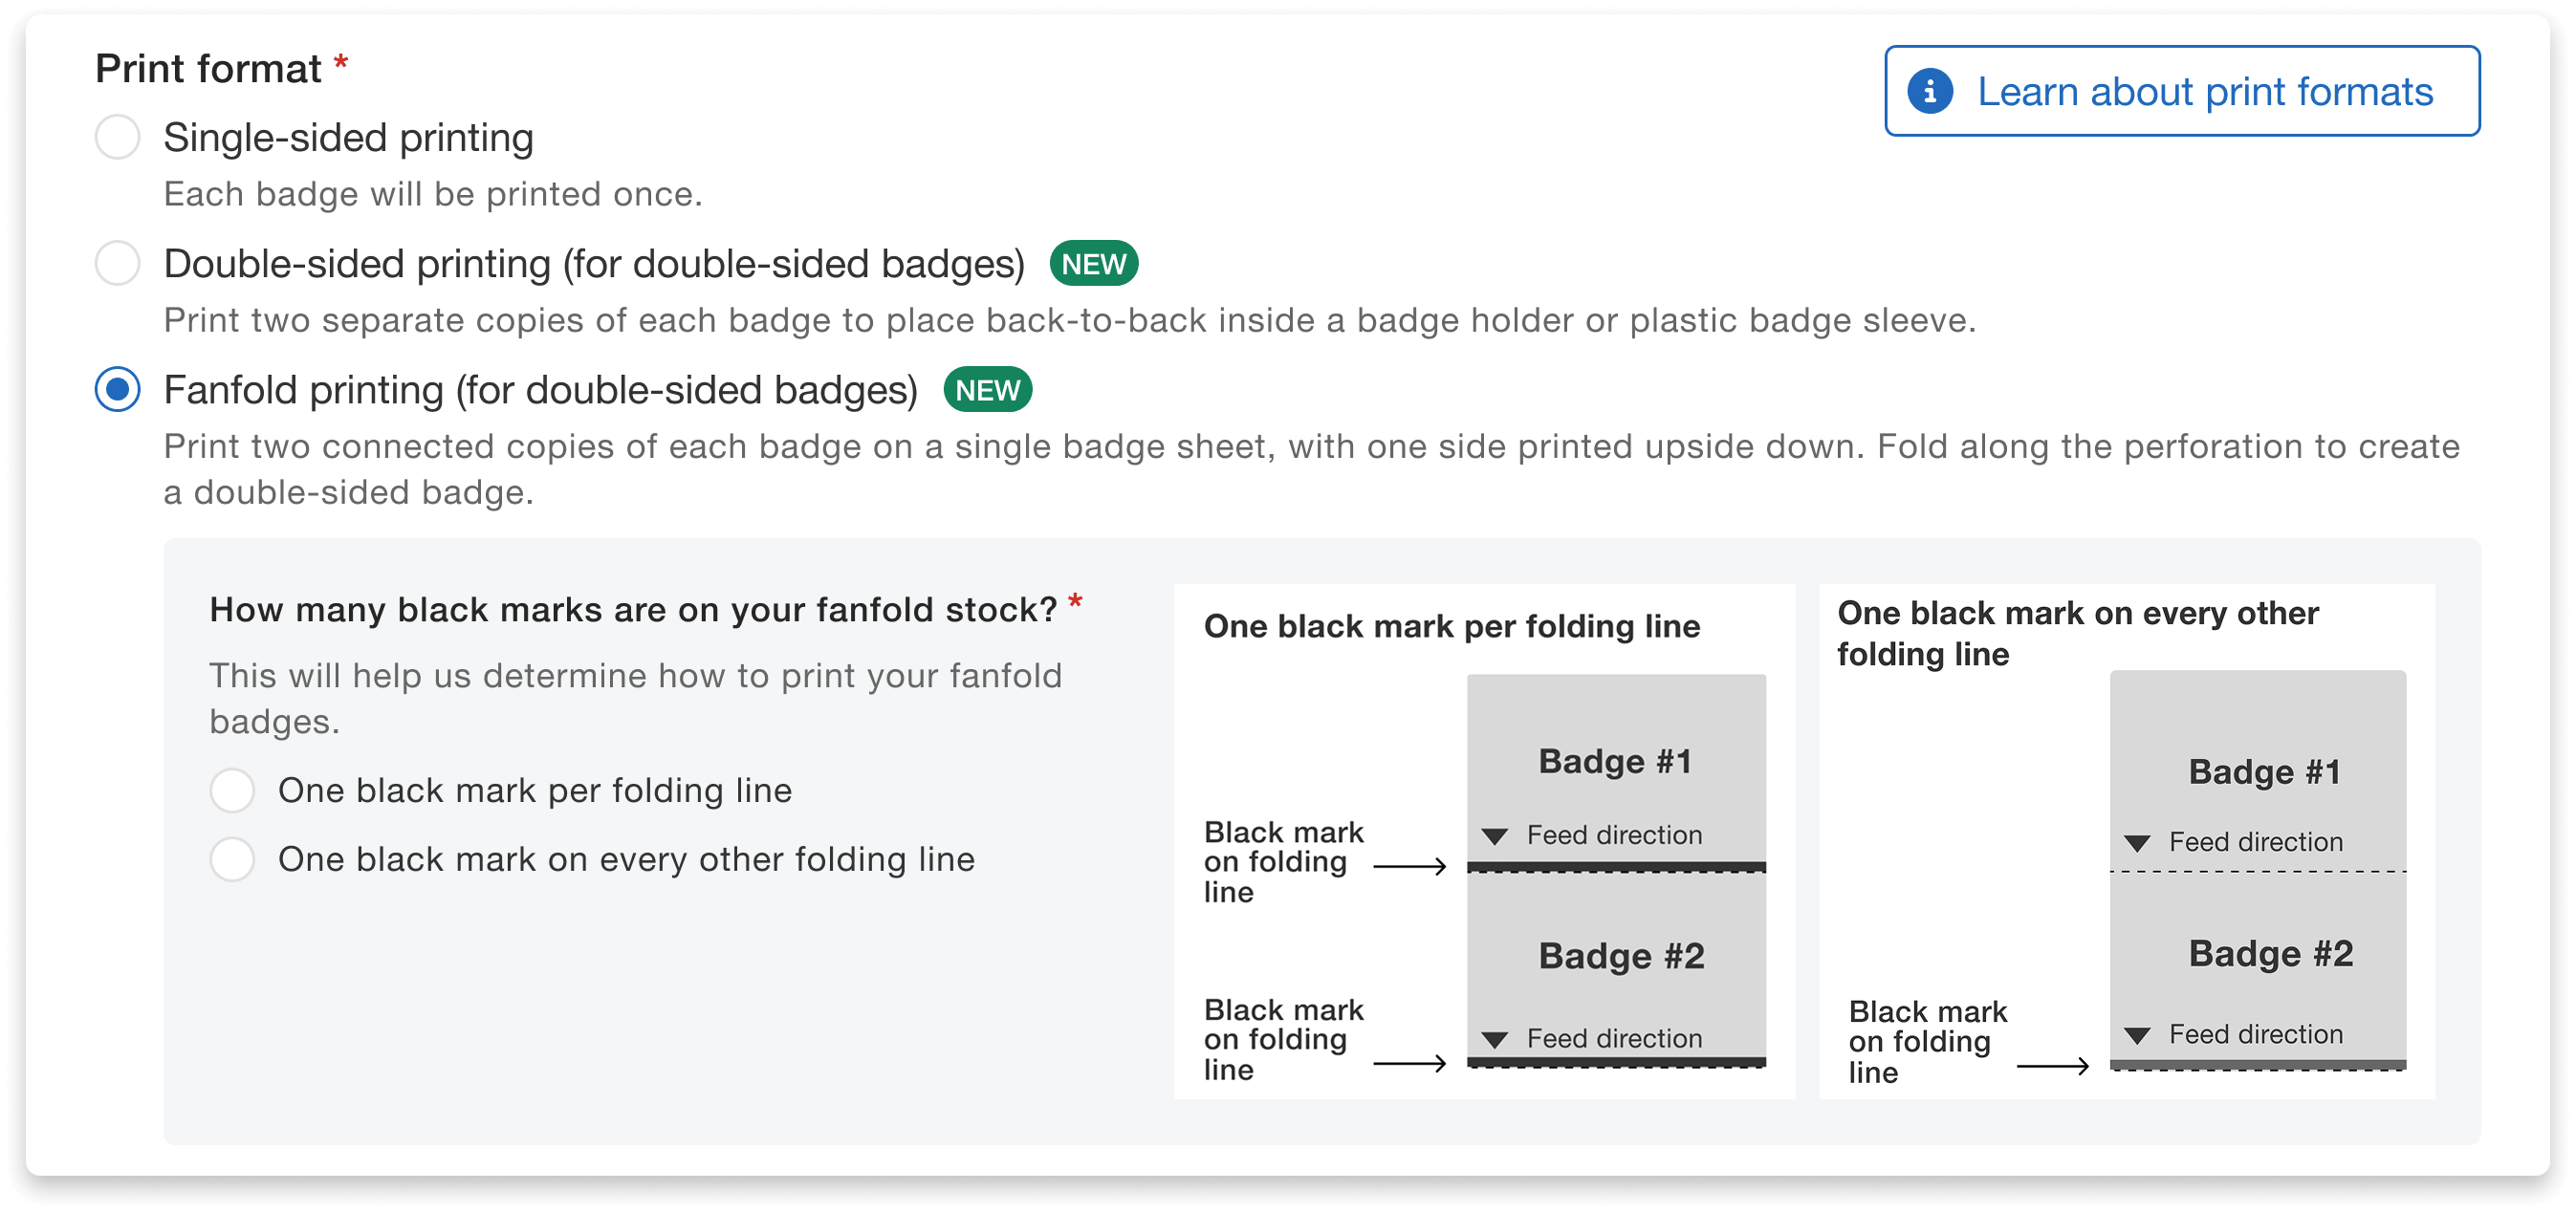
For smooth printing, select the specific fanfold badge stock you plan to use.
Make sure your selection matches the fanfold stock you’re using so the printer can align each badge correctly.
Once your settings are finalized, click Print test page to verify the badge layout meets your expectations or Generate badges to download a print-ready PDF of your badges.
Print Fanfold Badges On Site
Prefer to print badges as attendees arrive? You can configure fanfold printing for both on-demand badge printing and self-service Kiosk Check-in, giving attendees a ready-to-wear badge as soon as they check in.
To configure on-site badge printing, start by finalizing your badge design on the Name Badges page. Then, set up on-site badge printing for event check-in by selecting Configure.
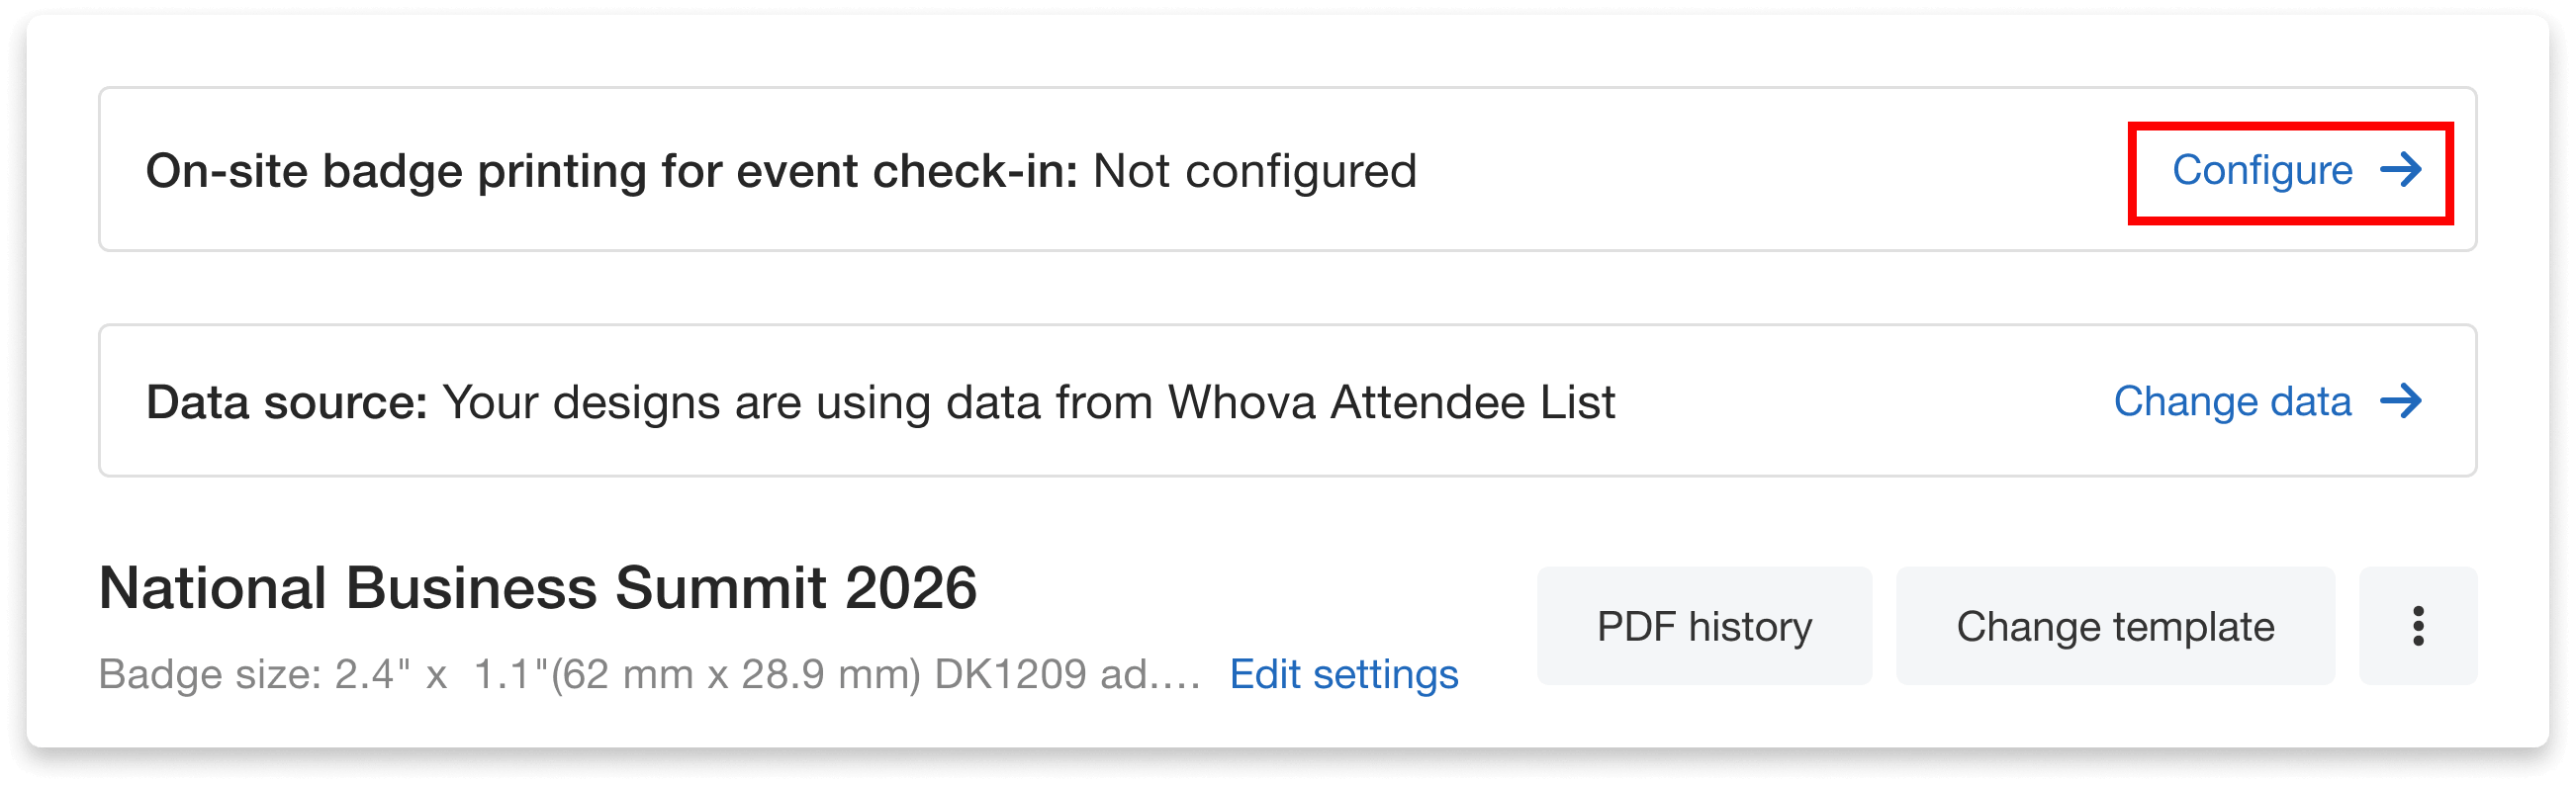
Configure your settings for printing your badges on site.
Specify which badge template should be printed for each attendee category. If an attendee belongs to multiple categories, you’ll be able to choose the appropriate badge template before continuing.
Next, select your print format:
- Single-sided printing: Print one copy of the badge design on one side of blank name badge paper.
- Duplicate printing: Print two copies of the badge design, either on standard badge paper or as adhesive labels that can be attached to both sides of a plastic badge.
- Fanfold printing: Print two connected copies of the badge design on fanfold badge stock, with one copy upside down so both sides are right-side up when the badge is folded.
Choose Fanfold printing, then specify how many black marks appear on your badge stock:
- One black mark per folding line
- One black mark on every other folding line.
Don’t forget to click Save when you’re finished. You can return to these settings and make adjustments at any time.
Now that you’ve configured your onsite print settings, you can enable automatic badge printing so (1) badges print on-demand once staff check in an attendee or (2) badges print when an attendee checks in via Kiosk.
1. On-demand badge printing:
To print badges automatically as attendees are checked in, start by opening the Check-in dropdown on the Check-in & Checkout section of the organizer dashboard. On the Check-in page, click “Start” next to Check-in for the event.
Then, click “Set up” in the top right hand corner of the Event Check-in page to print badges on-demand as attendees check in. Open the Badge Printing Portal from the pop-up that appears and complete the listed setup steps. Once each step is complete, click “Turn on” to enable automatic badge printing after an attendee checks in.
With your on-demand print settings configured, name badges will be printed automatically after attendees check in without requiring staff to generate each badge individually.
You can also print or reprint badges for specific attendees by opening the Check-in page and searching for the individual’s name on the Event Check-in dashboard. Simply click “Print badge” next to the attendee’s name and give them their new badge.
2. Self check-in Kiosk:
You can also let attendees check in and print their own fanfold badges using Whova’s Check-in Kiosk.
To set this up, go to the Kiosk Check-In page and enable the add-on. Then, complete the Kiosk setup process. When asked, “What do you want to use kiosks for?”, make sure to select “For self check-in + on-site badge printing” to print name badges as attendees check in.
Once setup is complete, attendees can check themselves in from the Kiosk and receive their badges directly from a connected printer, helping keep the check-in experience moving smoothly.
Add Exhibitor/Sponsor Tiers to Name Badges
Help your event staff quickly verify exhibitor and sponsor tiers by including an informative label directly on their badge. No need for staff to consult separate lists or check manually!
Open your badge template by opening the Name Badges page under the Attendee tab. On the right side of the page, find the “Attendee info” menu under the badge “Elements”.
Check the box next to Exhibitor or Sponsor Tier to add the badge holder’s tier level to your design.
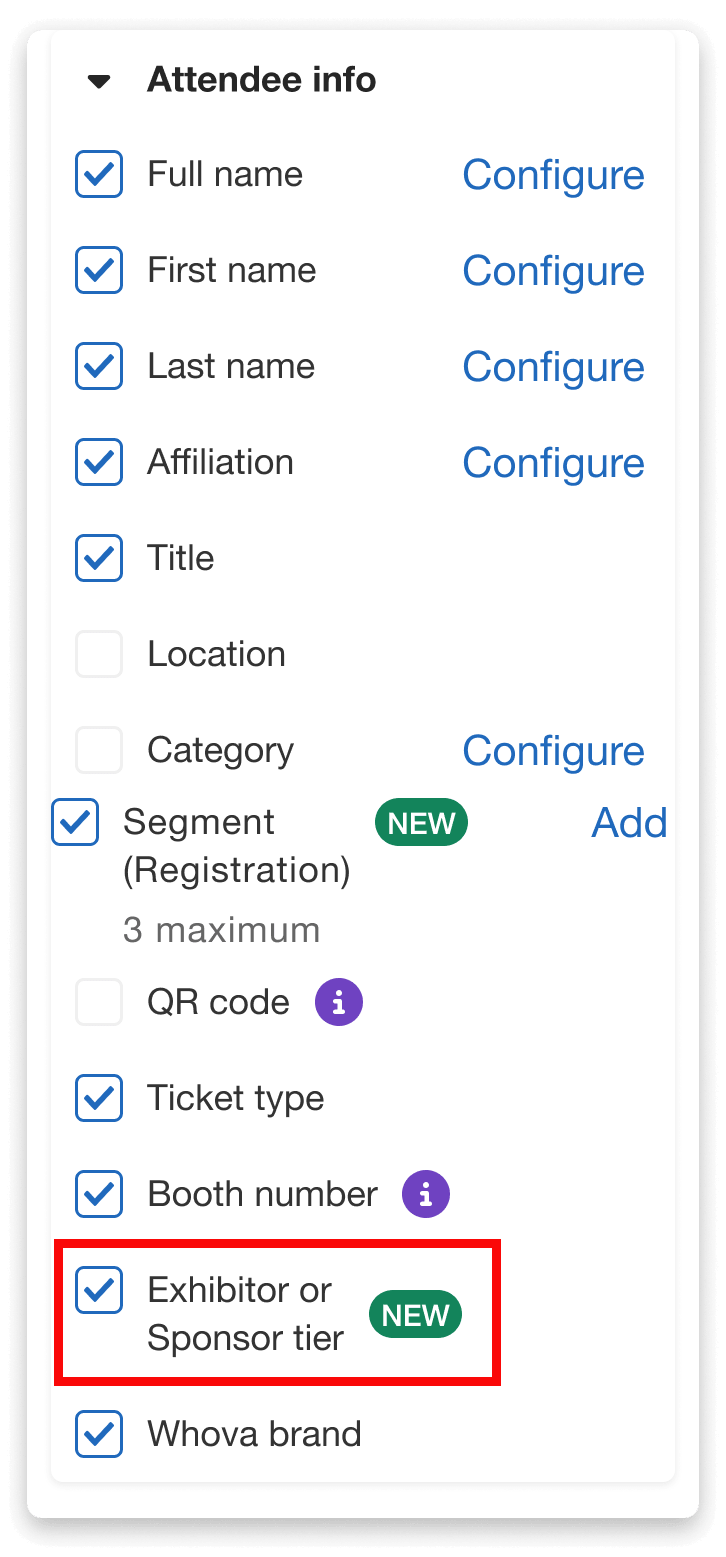
Choose your desired design elements while customizing your name badge template.
A pop-up will ask whether you’d like to display an exhibitor or sponsor tier on the badge. Select the appropriate option for your template.
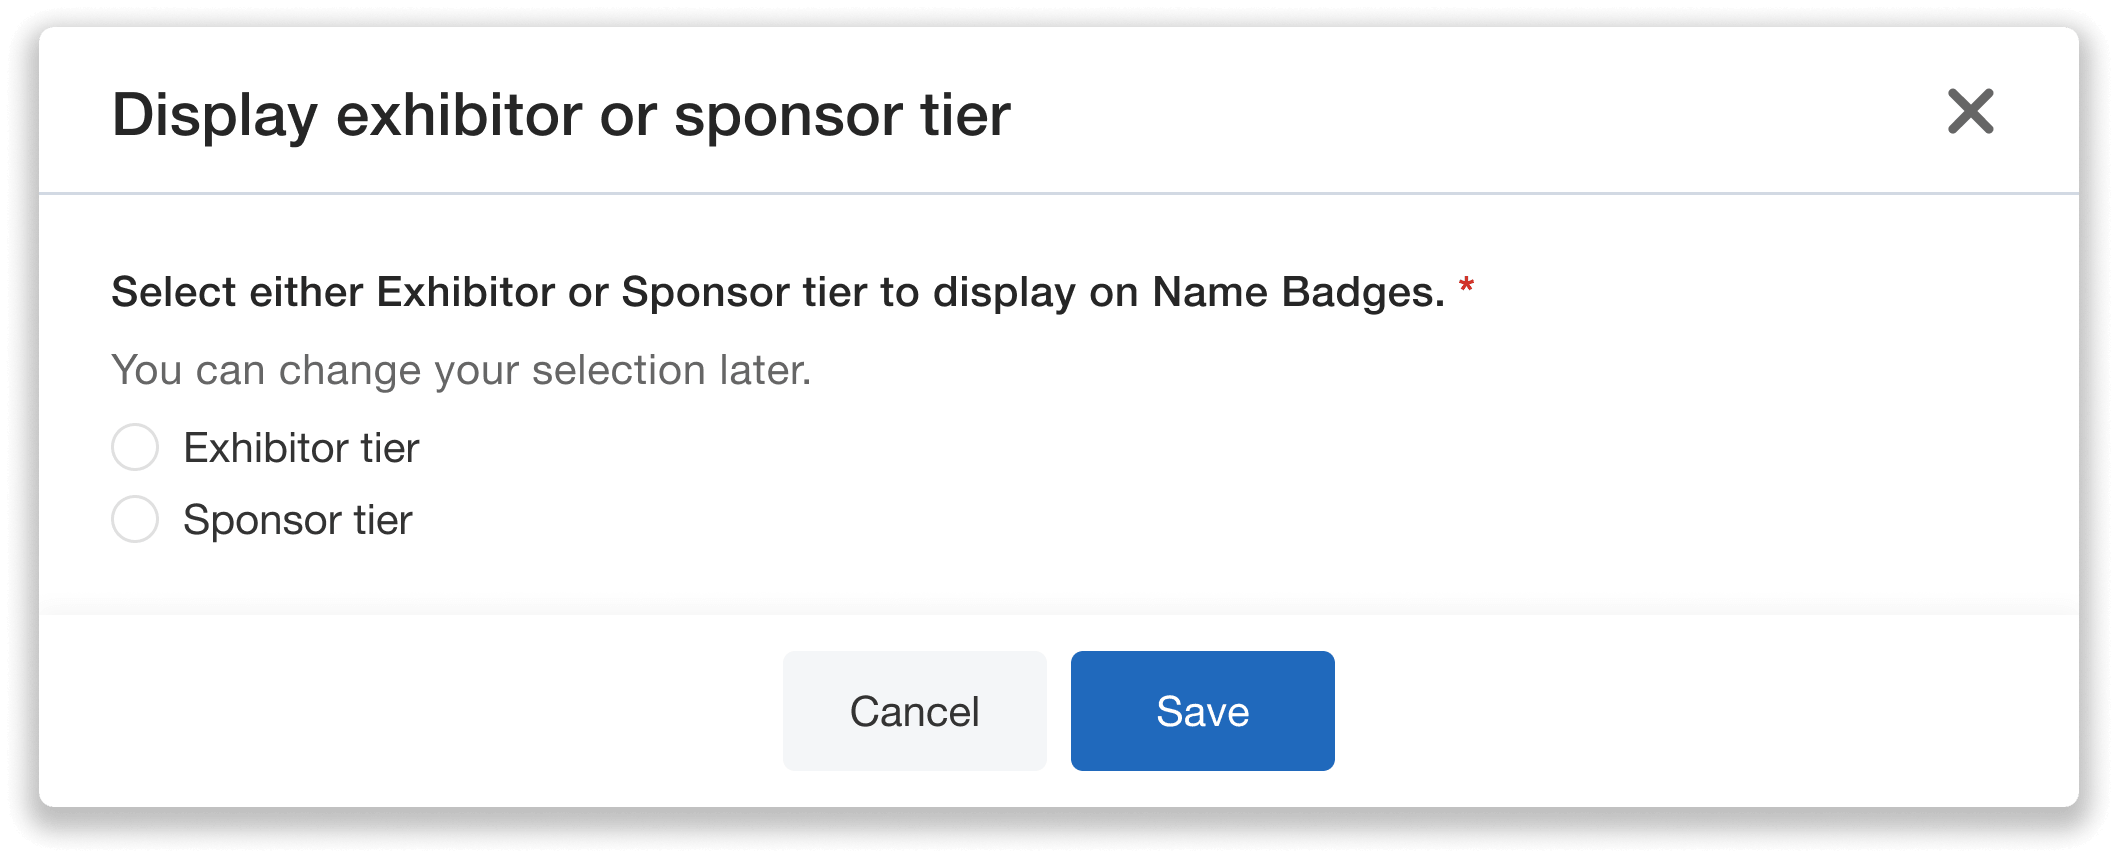
Select either Exhibitor or Sponsor tiers to be displayed on your template.
If you want to display both exhibitor and sponsor tiers at your event, simply set up a second badge template. Choose the alternate label option so you have two distinct badge templates—one for exhibitors and another for sponsors. You can then assign the template to the appropriate attendee category when configuring your print settings.
After selecting the tier type, customize your badge layout and position the tier label wherever it works best for your design.
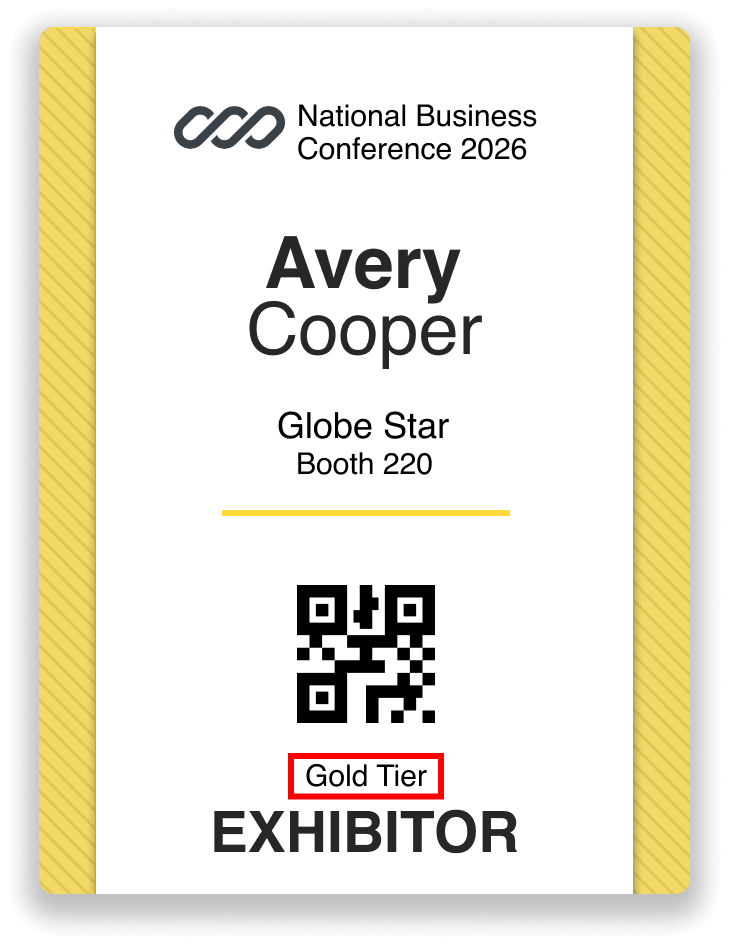
Customize how exhibitor/sponsor tiers appear on your name badges.
Once your template is ready, you can either preview the layout by testing your design or generate badges for printing.
With tier information displayed directly on name badges, staff can more easily recognize Platinum, Gold, Silver, or other specific tier levels, ensuring every sponsor or exhibitor receives the appropriate access and benefits such as a VIP lounge or an exclusive networking session.
Deliver a Better Badge Experience at Every Event
Name badges do more than identify attendees. They help people connect, assist staff in coordinating event activities, and make important information easy to find throughout the event.
With fanfold badge printing, you can keep important information visible on both sides of your badges whether you print badges in advance or as attendees check-in on site. Adding exhibitor and sponsor tier labels makes it easier for your team to verify and manage tier-specific access at a glance with less manual verification.
Together, these updates help your team prepare badges that serve both attendees and event staff, making it easier to identify the right people and keep event activities running smoothly.
Ready to do more with your event’s name badges? Explore Whova’s name badge customization and printing options to prepare for your next event. Reach out to your Whova representative to learn more about these enhancements and find the right setup for your team.