Name badges play a central role in improving attendee networking and event check-in, and yet designing and ordering name badges can pose significant challenges and expenses.
Creating individual name badges for hundreds of attendees can be tedious and time consuming, prompting many organizers to work with third party printing companies to create name badges. However, this can lead to delays with shipping and difficulties with making last minute changes, meaning organizers have to order name badges up to four weeks before the event. To avoid these challenges and be able to respond to last minute registrants, some organizers have turned to onsite printing services which will take over the name badge printing process, but can cost over ten thousand dollars.
In this comprehensive guide, we’ll walk you through the process of creating your own DIY name badges. Not only does this approach offer personalization, but it also presents a cost-effective solution that can be tailored to your event’s unique identity.
The decision to opt for DIY name badges offers many benefits that go beyond mere practicality. Here’s why embracing this approach can make a world of difference:
- Cost-Efficiency and Budget Control: Third-party printing services often come with a hefty price tag, especially when customization is involved. With a DIY approach, you have complete control over the expenses. By sourcing materials yourself and using readily available tools, you can allocate your budget strategically, ensuring that every aspect of your event receives the attention it deserves.
- Unparalleled Customization: DIY name badges provide a level of customization that third-party services simply can’t match. When you take the reins, you have the creative freedom to design badges that align perfectly with your event’s theme, branding, and overall aesthetic. This level of personalization creates a sense of connection and belonging among attendees, leaving a lasting impression.
Quick Turnaround Time: Relying on third-party printing services can sometimes lead to delays, especially during peak event seasons. By choosing the DIY route, you eliminate the need to coordinate with external vendors. This means you have complete control over the production timeline, ensuring that your name badges are ready well in advance of your event. - Adaptability to Last-Minute Changes: Events are dynamic, and sometimes, last-minute adjustments are inevitable. When you create your own name badges, you have the flexibility to accommodate any changes on the fly. Whether it’s a new attendee registration or a revised schedule, you can quickly update the badges without relying on external vendors.
- Empowerment and Skill Development: Taking on the task of DIY name badges empowers you and your team with valuable skills. It’s an opportunity to learn, innovate, and grow together, strengthening your event planning capabilities for future endeavors.
In the following sections, we’ll guide you through the step-by-step process of bringing your DIY name badge vision to life, ensuring that your event stands out in the minds of attendees.
Cost Comparison: DIY vs. Third Party Name Badges
Before diving into DIY name badges, we first break down the costs associated with both DIY name badges and third-party printing services, equipping you with the insights you need to make an informed decision that aligns with your event’s goals and budget. In comparison, the DIY approach is the most cost effective name badge option and allows you to save money and stay within your budget. Both DIY approaches cost fewer than $800 for printing 500 badges, roughly $1.6 per badge.
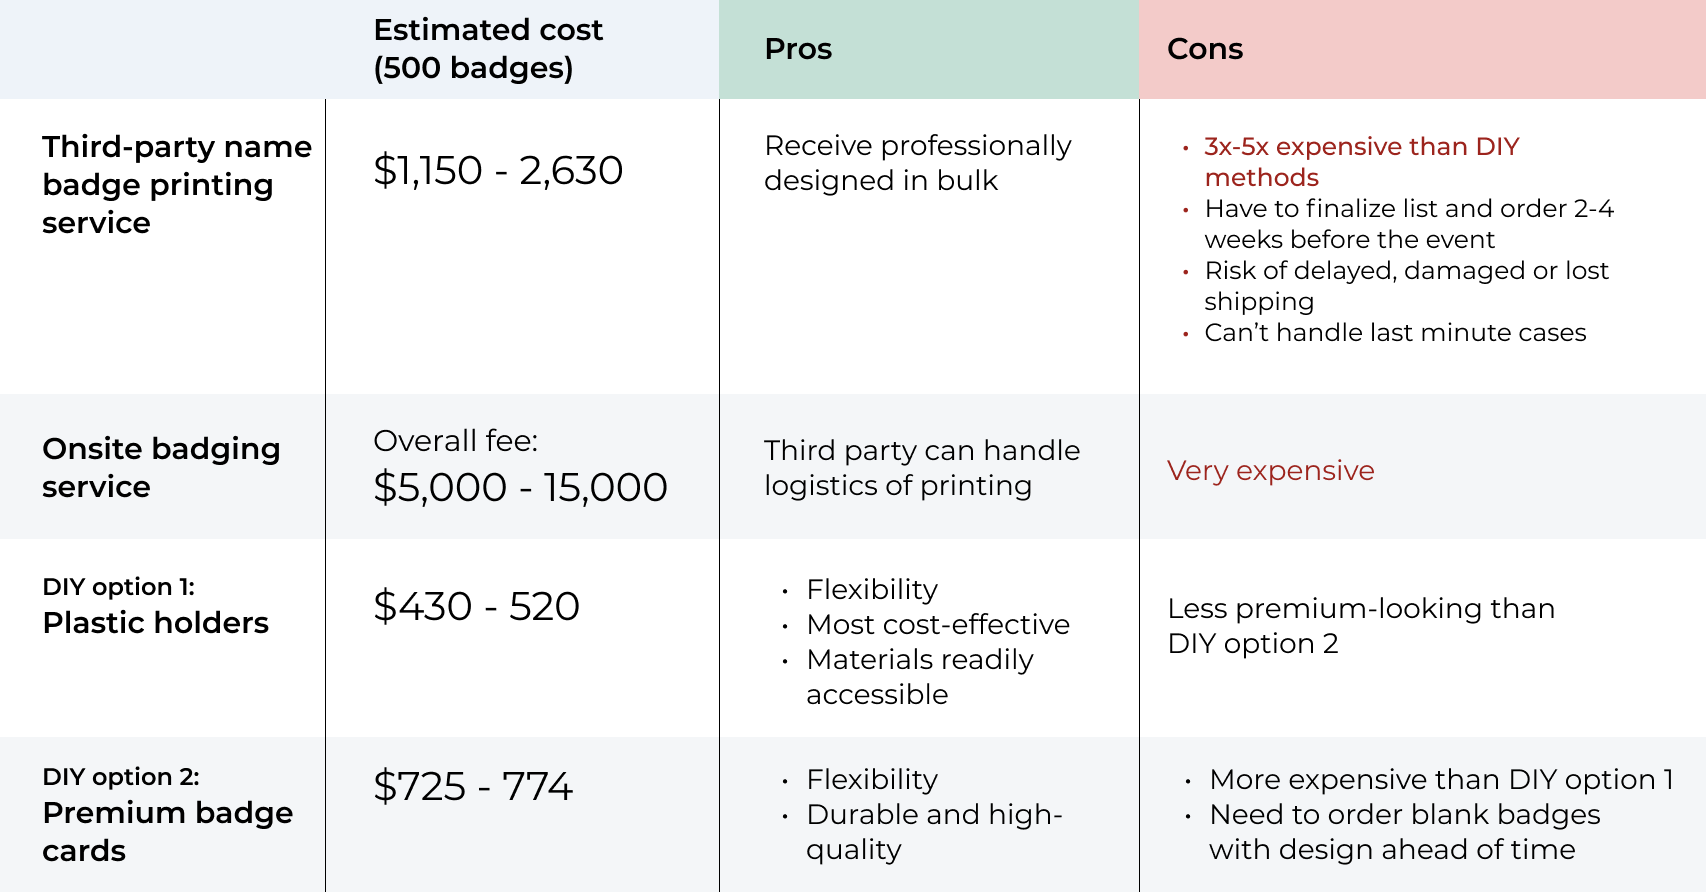
*** Note: These calculations are based on prices in October 2023, which are subject to change. Links to products in the article are from October 2023 and may be outdated. ***
Two Popular DIY Name Badge Options
DIY Option 1: Badge Holder
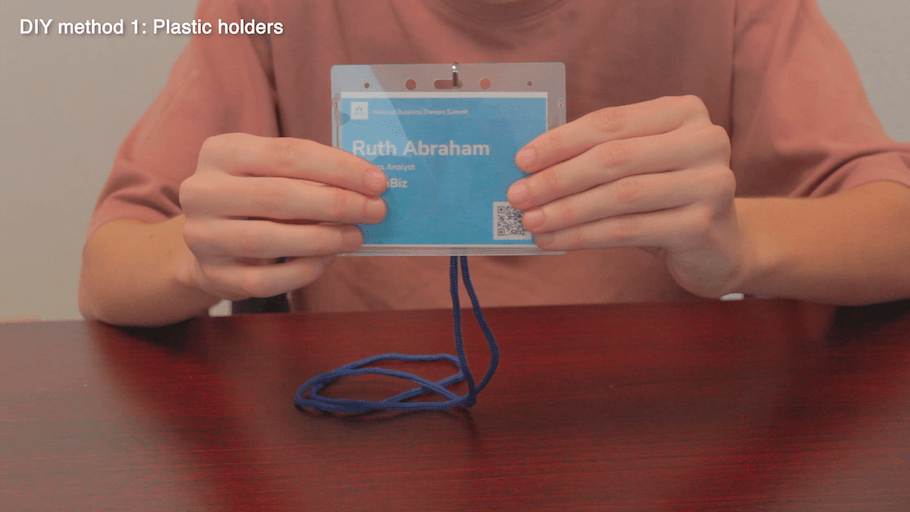
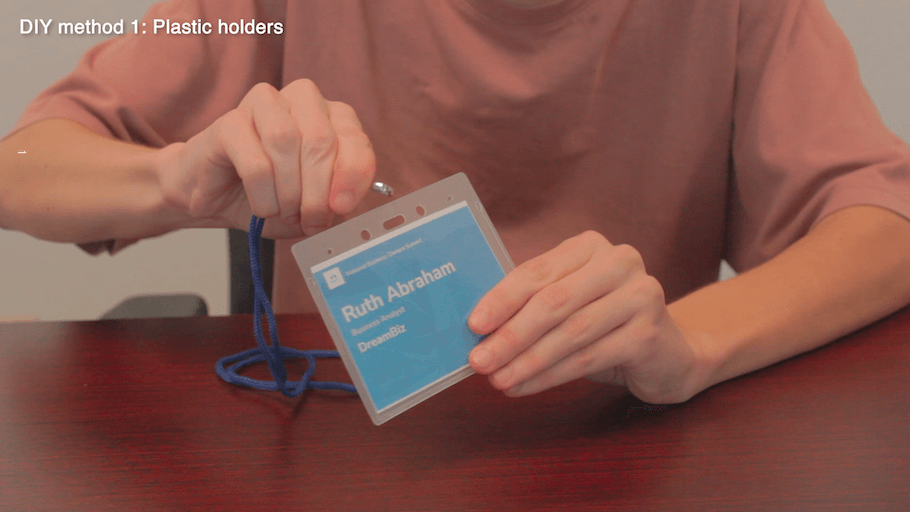
For the most cost effective approach to name badges, we recommend using a plastic badge holder, as shown in the above photo.
Materials:
To make name badges with a plastic badge holder you will need the following:
- Medium-thick paper or perforated badge paper
- Plastic badge holder (typically with one hole)
- A lanyard with one clip
- A printer
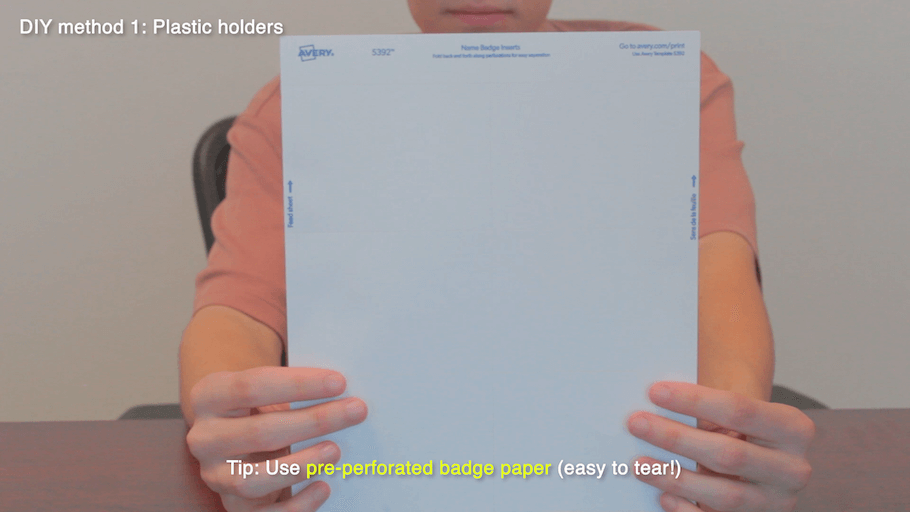
We highly recommend using the perforated badge paper to simplify the process. If you opt to not use the perforated badge paper, we recommend a medium-thick cardstock paper to ensure the paper is sturdy enough to easily be inserted into the badge holder. Keep in mind that if you choose to use cardstock, you will need to make sure to have a paper cutter available. For both types of paper, be sure to print a size that will fit in your badge holder.
Steps:
Before assembling the badges, begin by designing and generating the badges. This step can easily be accomplished by leveraging an event management software. For example, all-in-one event management solution Whova can help simplify the process by providing professional name badge templates, and automatically generating the badges from your attendee list.
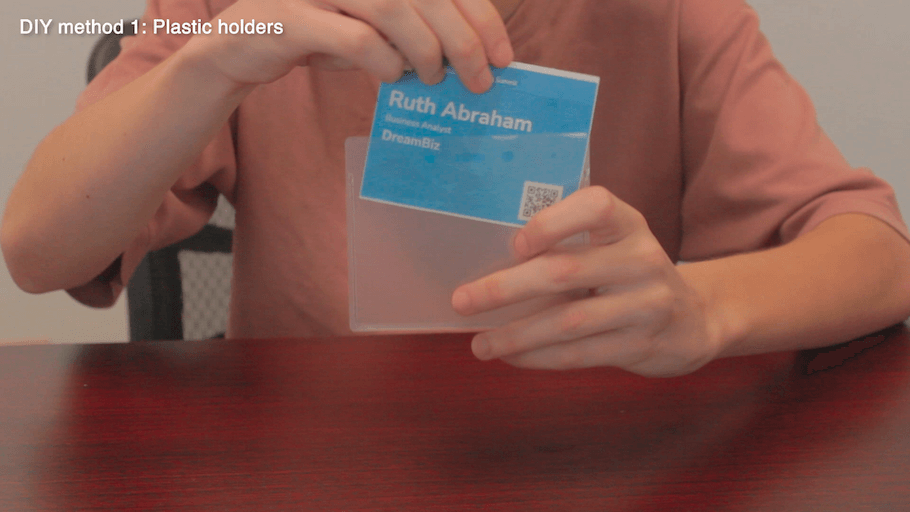
It is very straightforward to prepare your badges ahead of time offsite with an office printer that prints color and can print thicker badge paper. Most office printers can accommodate the thicker badge paper. Simply download a pdf of your badges and print. If you chose the perforated badge paper, all you need to do is detach the badges from the sheet, slide them into the plastic badge holder, and attach the lanyard. If you printed on cardstock, you will need to cut the paper before following the same steps to complete the badges.
 |
 |
 |
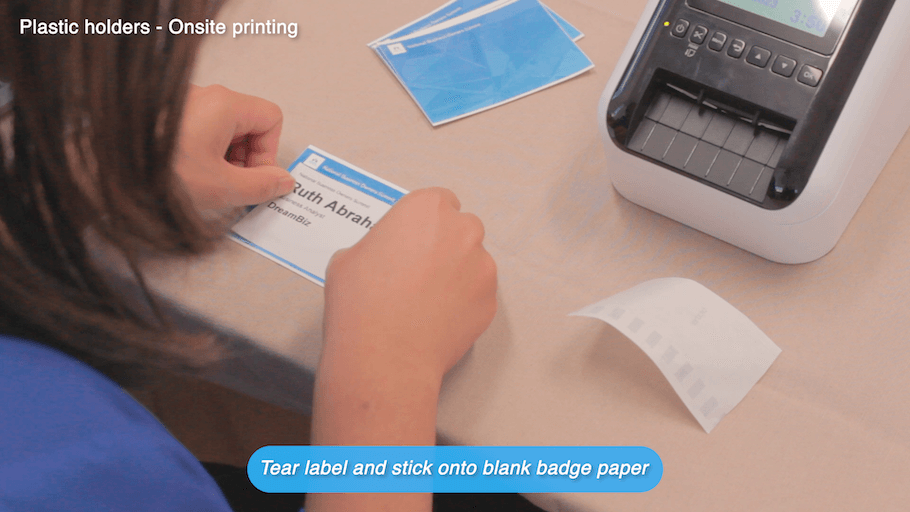
If you’re planning to print the badges onsite, we recommend you use a label printer as it is much more portable than office printers. If you need a label printer, the popular printer brands we recommend are Brother, Zebra, and DYMO. In addition to plastic badge holders and lanyards, to print badges onsite, you will need to bring label paper (be sure to order the paper that goes with your printer brand) and badge paper that is pre-printed with your desired design.
The Whova Event Management platform allows you to print such empty name badges ahead of time on thick cardstock paper, as shown in the above image.
Using the label printer gives you the ability to print name badges as attendees arrive. You will then simply attach the labels to the cardstock paper, slide it into the plastic holder, and attach the lanyard.
Altogether, the materials for this DIY option is estimated to cost less than a dollar per attendee, making it the cheapest approach to name badges.
DIY Option 2: Premium Plastic Card
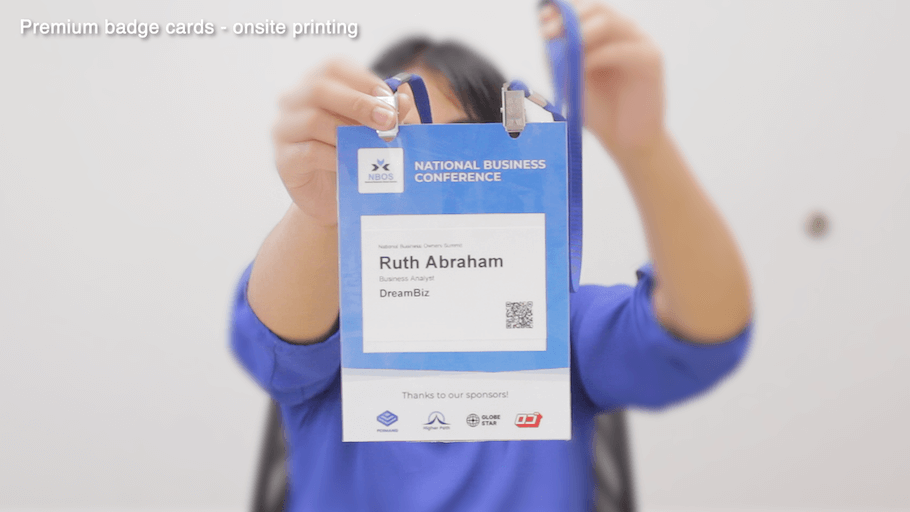
If you would like your name badge to appear high-end, or be able to highlight your event sponsors, using the plastic card badge shown above might be the best fit for your event.
This approach will require you to use a label printer. When designing and generating your badge, be sure to select your printer type as this will affect the dimensions and design of your badge.
Materials:
If you do not currently have access to a label printer, the printer brands we recommend are Brother, Zebra, and DYMO. To make the plastic card name badges you will need:
- A thick plastic badge with your custom design
- A lanyard with two clips
- Label paper (be sure to order the paper that goes with your printer brand)
Steps:
First, design and order your premium badge card from an online service such as Staples, 4inlanyards, and Conference Badge. Many will offer the option to order custom 2-clip lanyards with the badges. These will need to be ordered in advance.
Afterwards, similar to Option 1, you will need to design and generate your name badges before you begin assembling them.
 |
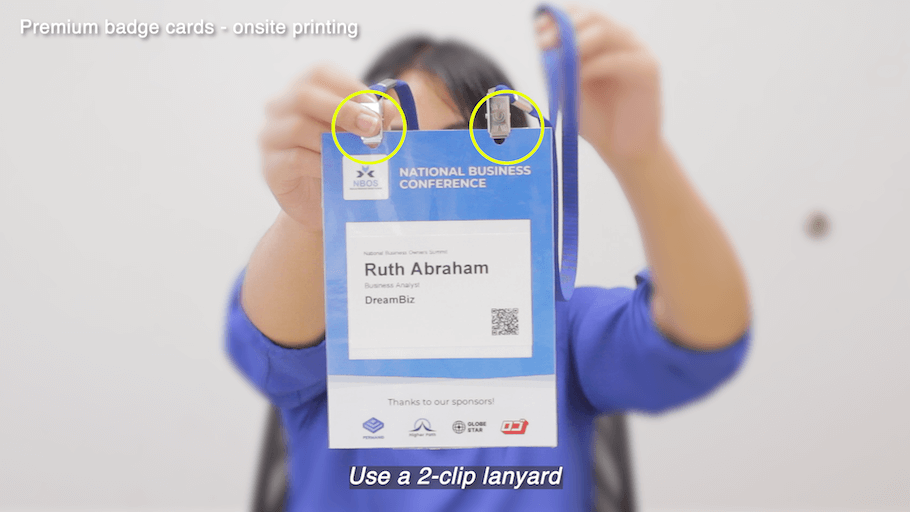 |
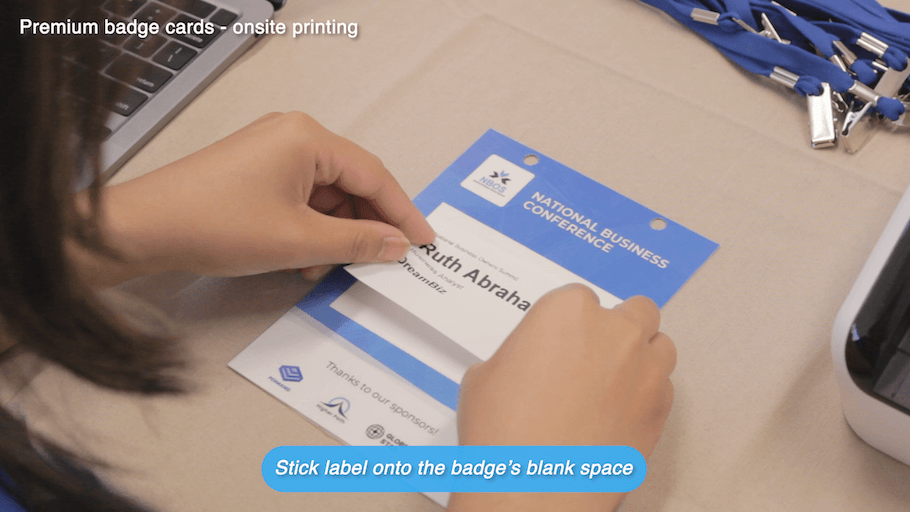
Once you have the materials, assembling the name badges is very simple. Simply download the name badges, print them using a label printer, attach them to the premium badge card, and clip on the lanyard. You can choose to assemble the badges in advance, assemble them onsite as attendees arrive, or do a combination of the two.
The main benefit to this DIY approach is that it is the easiest to assemble and will likely take the least amount of time. It also offers a high level of customization, with the ability to add sponsors to the badge card itself or to the lanyard. The estimated cost is less than two dollars per attendee, making this the most economical premium name badge option.
Summary
DIY name badges do not need to be intimidating. Using professional templates, creating your own name badges saves time, reduces costs, and simplifies the overall process. Many organizers who choose to create their own name badges use offsite printing to prepare most badges ahead of the event and onsite printing to make last minute changes and accommodate last minute registrations.
If you would like to learn how to design and generate name badges using Whova’s name badge feature, please reach out to hello@whova.com for request for a one-on-one demo.
